Talos with Kubernetes on Proxmox

Introduction to Talos OS
Talos OS is a modern, minimal, and immutable Linux distribution designed specifically for running Kubernetes. Unlike traditional Linux distributions, Talos OS is:
- Minimal and immutable: The entire system is read-only, preventing configuration drift and improving security.
- API-driven: No SSH, no shell, no package manager - everything is managed through APIs.
- Purpose-built for Kubernetes: Designed from the ground up to run Kubernetes efficiently.
- Secure by default: Reduced attack surface with no interactive shell and read-only filesystem.
Developed by Sidero Labs (formerly Talos Systems), Talos OS represents a paradigm shift in how we deploy and manage Kubernetes infrastructure. This guide will walk you through setting up a complete Kubernetes cluster using Talos OS on Proxmox virtualization platform.
Prerequisites
Before we begin, ensure you have the following:
- A Proxmox server installed and running (version 6.x or later recommended)
- At least 8GB of RAM available for the cluster (2GB per node minimum)
- At least 40GB of storage space available
- Network connectivity between your workstation and the Proxmox server
- Administrative access to the Proxmox web interface
Step 1: Install talosctl on Your Workstation
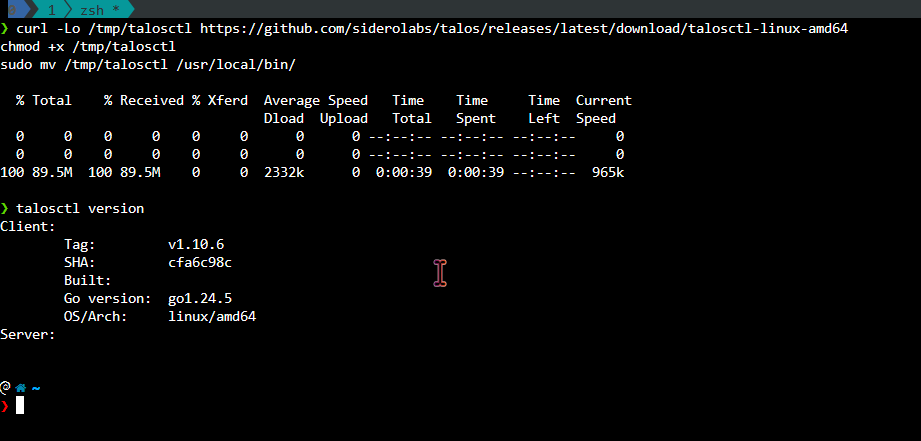
The talosctl utility is the primary tool for interacting with Talos OS. Install it on your workstation (not on Proxmox) by running the appropriate command for your platform:
For Linux (x86_64)
1
2
3
curl -Lo /tmp/talosctl https://github.com/siderolabs/talos/releases/latest/download/talosctl-linux-amd64
chmod +x /tmp/talosctl
sudo mv /tmp/talosctl /usr/local/bin/
For macOS
1
2
3
curl -Lo /tmp/talosctl https://github.com/siderolabs/talos/releases/latest/download/talosctl-darwin-amd64
chmod +x /tmp/talosctl
sudo mv /tmp/talosctl /usr/local/bin/
For Windows
1
2
Invoke-WebRequest -Uri https://github.com/siderolabs/talos/releases/latest/download/talosctl-windows-amd64.exe -OutFile talosctl.exe
# Move talosctl.exe to a directory in your PATH
Verify the installation by running:
1
talosctl version
Step 2: Download Talos OS ISO
Download the latest Talos OS ISO image from the official GitHub releases page:
1
curl -Lo talos.iso https://github.com/siderolabs/talos/releases/latest/download/metal-amd64.iso
Step 3: Upload ISO to Proxmox
- Log in to your Proxmox web interface
- Select your Proxmox node in the left sidebar
- Go to Local storage under the node
- Select the Content tab
- Click Upload
- Select ISO Image and click Select File
- Choose the Talos OS ISO you downloaded
- Click Upload
Step 4: Create Virtual Machines
We’ll create three VMs: one control plane (master) node and two worker nodes. Let’s start with the control plane node:
Create Control Plane Node VM
Create Control Plane Node VM in Proxmox (Talos OS)
- Create VM → Name: talos-kube-cp → VM ID: default/custom.
- OS: ISO: Talos OS (uploaded) → Storage: local.
- System: VGA default → VirtIO SCSI → Enable Qemu Agent.
- Disk: 20 GB, qcow2, Storage: local-lvm or preferred.
- CPU: 1 socket, 2 cores (min), Type: host.
- Memory: 2048 MB (min).
- Network: Bridge: vmbr0, Model: VirtIO.
- Finish → Start VM.
Create Worker Node VMs
Repeat the above process to create two worker nodes with the following changes:
- Name:
talos-kube-w1andtalos-kube-w2 - You can reduce the disk size to 15 GB for worker nodes if desired
Step 5: Start the Control Plane Node
- Select the
talos-kube-cpVM in the Proxmox web interface - Click Start
- Open the console to monitor the boot process
- Wait for the VM to boot into Talos OS maintenance mode
- Note the IP address displayed in the console (we’ll refer to this as
CONTROL_PLANE_IP)
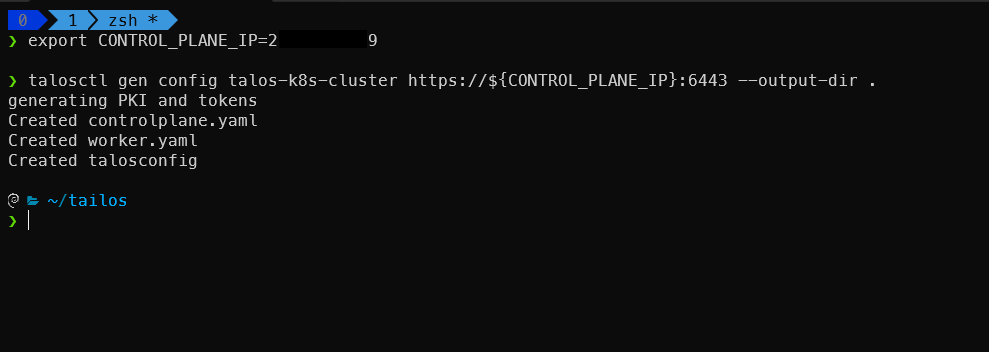
Step 6: Generate Talos Configuration Files
On your workstation, create a directory to store the Talos configuration files:
1
2
mkdir -p ~/talos-cluster
cd ~/talos-cluster
Generate the configuration files using talosctl:
1
2
export CONTROL_PLANE_IP=<your-control-plane-ip>
talosctl gen config talos-k8s-cluster https://${CONTROL_PLANE_IP}:6443 --output-dir .
This command creates several files:
controlplane.yaml: Configuration for additional control plane nodesworker.yaml: Configuration for worker nodestalosconfig: Client configuration for talosctl
Step 7: Apply Configuration to Control Plane Node
Apply the generated configuration to the control plane node:
1
talosctl apply-config --insecure --endpoints ${CONTROL_PLANE_IP} --nodes ${CONTROL_PLANE_IP} --file controlplane.yaml --talosconfig=./talosconfig
Note: Talos Linux works best with a
static IPfor API access. If you rely onDHCP, a reboot can give your node a new IP, making it unreachable. To avoid manual reconfiguration, I use DHCP reservations—binding a fixed IP to the VM’s MAC address in the router—so the VM always gets the same IP without editing Talos configs each time.
This will install Talos OS to disk and configure it as a Kubernetes control plane node. The process takes a few minutes. You can monitor the progress in the Proxmox console.
NOTE: you can check the disk space by running
talosctl get disks --insecure --nodes $CONTROL_PLANE_IP --endpoints ${CONTROL_PLANE_IP}
Step 8: Wait for the Cluster to Initialize
Wait for the Kubernetes control plane to initialize (this may take a few minutes):
1
2
talosctl bootstrap --nodes ${CONTROL_PLANE_IP} --endpoints ${CONTROL_PLANE_IP}  --talosconfig=./talosconfig
talosctl health
You should see output indicating that the cluster is healthy.
Step9: Start Worker Nodes
- Start both worker VMs in the Proxmox web interface
- Open the console for each worker node
- Note the IP addresses displayed in the console (we’ll refer to these as
WORKER_1_IPandWORKER_2_IP)
Step 10: Apply Configuration to Worker Nodes
Apply the worker configuration to each worker node:
1
2
3
4
5
export WORKER_1_IP=<your-worker-1-ip>
export WORKER_2_IP=<your-worker-2-ip>

talosctl apply-config --insecure --nodes ${WORKER_1_IP} --file worker.yaml
talosctl apply-config --insecure --nodes ${WORKER_2_IP} --file worker.yaml
Step 11: Configure talosctl
Configure talosctl to communicate with your Talos cluster:
1
2
3
export TALOSCONFIG=talosconfig
talosctl config endpoint ${CONTROL_PLANE_IP}
talosctl config node ${CONTROL_PLANE_IP}
Step 12: Retrieve Kubernetes Configuration
Fetch the Kubernetes configuration file:
1
talosctl kubeconfig --nodes ${CONTROL_PLANE_IP} -f
This will save the kubeconfig to ~/.kube/config by default. If you want to save it to a different location, use:
1
2
talosctl kubeconfig --nodes ${CONTROL_PLANE_IP} --force -o ~/talos-cluster/kubeconfig
export KUBECONFIG=~/talos-cluster/kubeconfig
Step 13: Verify Cluster Status
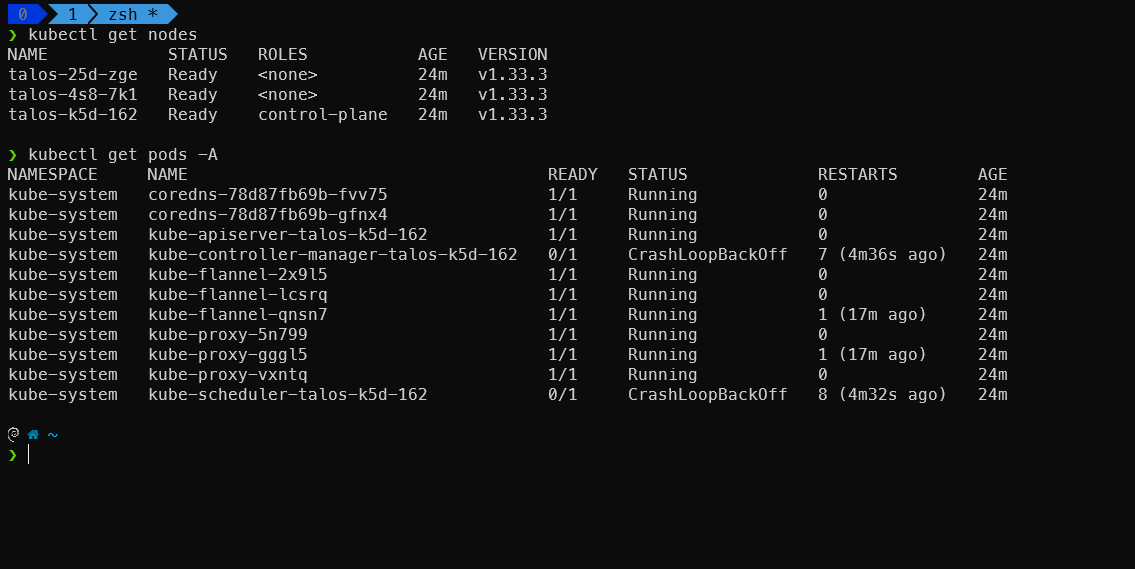
Verify that your Kubernetes cluster is up and running:
1
2
3
4
curl -LO "https://dl.k8s.io/release/$(curl -L -s https://dl.k8s.io/release/stable.txt)/bin/linux/amd64/kubectl"
chmod +x kubectl
sudo mv kubectl /usr/local/bin/
kubectl get nodes
You should see output similar to this:
1
2
3
4
NAME                STATUS   ROLES                  AGE     VERSION
talos-kube-cp      Ready    control-plane,master   5m      v1.23.5
talos-kube-w1      Ready    <none>                 3m      v1.23.5
talos-kube-w2      Ready    <none>                 3m      v1.23.5
Check the status of system pods:
1
kubectl get pods -A
Step 14: Install a CNI Plugin (Optional)
Talos comes with flannel CNI by default, but you can install other CNI plugins if desired. For example, to install Cilium:
1
kubectl apply -f https://raw.githubusercontent.com/cilium/cilium/v1.11.0/install/kubernetes/quick-install.yaml
Managing Your Talos Cluster
Viewing Logs
To view logs from a specific service on a node:
1
talosctl logs -n ${NODE_IP} kubelet
Replace kubelet with any other service name to view its logs.
Restarting a Service
To restart a service on a node:
1
talosctl service restart -n ${NODE_IP} kubelet
Upgrading Talos OS
To upgrade Talos OS on all nodes:
1
talosctl upgrade --nodes ${CONTROL_PLANE_IP} --image ghcr.io/siderolabs/installer:v1.0.0
Replace v1.0.0 with the version you want to upgrade to.
Rebooting a Node
To reboot a node:
1
talosctl reboot --nodes ${NODE_IP}
Troubleshooting
Node Not Joining the Cluster
If a worker node is not joining the cluster, check the kubelet logs:
1
talosctl logs kubelet --nodes ${WORKER_IP}
Control Plane Issues
If the control plane is not initializing properly, check the etcd and apiserver logs:
1
2
talosctl logs etcd --nodes ${CONTROL_PLANE_IP}
talosctl logs kube-apiserver --nodes ${CONTROL_PLANE_IP}
Network Connectivity Issues
Verify network connectivity between nodes:
1
talosctl service net-probe --nodes ${NODE_IP} --interface eth0
Best Practices
-
Backup Your Configuration Files: Keep your Talos configuration files (
controlplane.yaml,worker.yaml, andtalosconfig) in a secure location. -
Use Version Control: Store your configuration files in a Git repository for version control and easy rollback.
-
Regular Upgrades: Keep your Talos OS and Kubernetes versions up to date to benefit from security patches and new features.
-
Monitor Resource Usage: Monitor the resource usage of your nodes to ensure they have adequate CPU, memory, and disk space.
-
High Availability: For production environments, consider deploying multiple control plane nodes for high availability.
Installing Helm on Talos OS
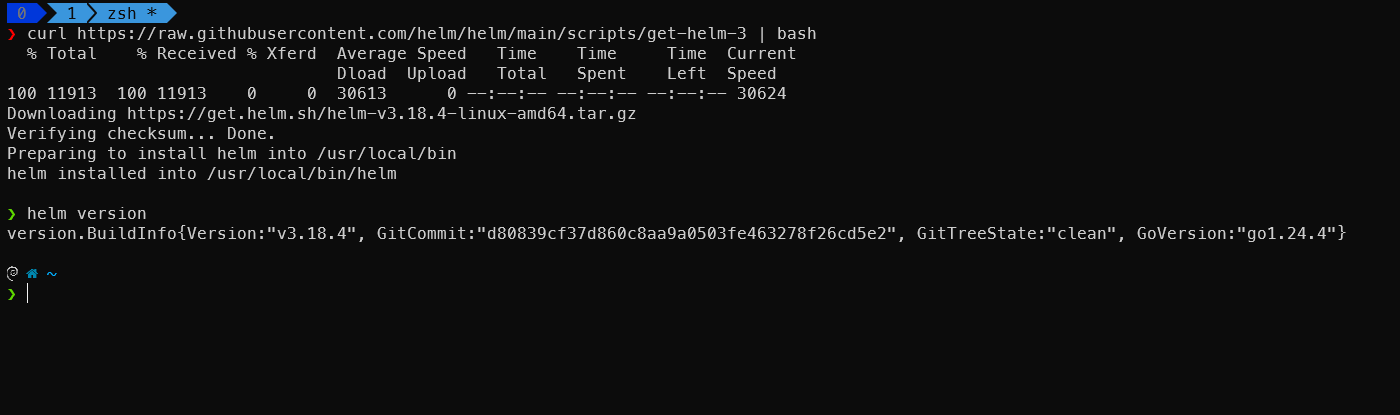
Talos OS does not come with Helm pre-installed, as it’s designed to be minimal and immutable. However, you can easily install Helm on your workstation to manage applications on your Talos Kubernetes cluster.
Installing Helm on Your Workstation
For Linux
1
curl https://raw.githubusercontent.com/helm/helm/main/scripts/get-helm-3 | bash
For macOS
1
brew install helm
For Windows
1
2
3
4
5
6
7
8
# Using Chocolatey
choco install kubernetes-helm

# Using Scoop
scoop install helm

# Using Winget
winget install Helm.Helm
Verify the installation:
1
helm version
Configuring Helm
Once Helm is installed, it will automatically use your Kubernetes configuration file (~/.kube/config or the file specified by the KUBECONFIG environment variable) to communicate with your cluster.
1
2
3
4
5
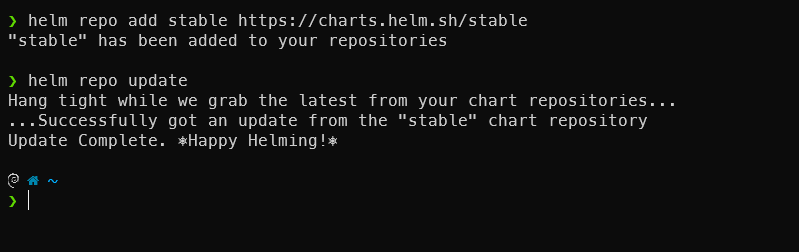
# Add the official Kubernetes charts repository
helm repo add stable https://charts.helm.sh/stable
# Update the repository
helm repo update
Installing Kubernetes Dashboards
Talos OS doesn’t include any dashboard by default. Here’s how to install various popular Kubernetes dashboards using Helm.
1. Kubernetes Dashboard
The official Kubernetes Dashboard provides a web-based UI for managing your cluster.
1
2
3
4
5
6
7
# Add the Kubernetes Dashboard repository
helm repo add kubernetes-dashboard https://kubernetes.github.io/dashboard/
helm repo update

# Install the dashboard
helm install kubernetes-dashboard kubernetes-dashboard/kubernetes-dashboard \
  --create-namespace --namespace kubernetes-dashboard
Create a service account and get an access token:
1
2
3
4
5
6
7
8
9
10
11
12
13
14
15
16
17
18
19
20
21
22
23
24
# Create a service account and cluster role binding
cat <<EOF | kubectl apply -f -
apiVersion: v1
kind: ServiceAccount
metadata:
  name: admin-user
  namespace: kubernetes-dashboard
---
apiVersion: rbac.authorization.k8s.io/v1
kind: ClusterRoleBinding
metadata:
  name: admin-user
roleRef:
  apiGroup: rbac.authorization.k8s.io
  kind: ClusterRole
  name: cluster-admin
subjects:
- kind: ServiceAccount
  name: admin-user
  namespace: kubernetes-dashboard
EOF

# Get the token
kubectl -n kubernetes-dashboard create token admin-user
Access the dashboard:
1
kubectl proxy
Then open in your browser: http://localhost:8001/api/v1/namespaces/kubernetes-dashboard/services/https:kubernetes-dashboard:/proxy/
2. Rancher
Rancher is an enterprise-grade Kubernetes management platform.
1
2
3
4
5
6
7
8
9
10
11
12
13
14
15
16
17
18
19
20
21
# Add the Rancher repository
helm repo add rancher-stable https://releases.rancher.com/server-charts/stable
helm repo update

# Install cert-manager (required for Rancher)
helm repo add jetstack https://charts.jetstack.io
helm repo update

kubectl create namespace cert-manager
helm install cert-manager jetstack/cert-manager \
  --namespace cert-manager \
  --create-namespace \
  --version v1.11.0 \
  --set installCRDs=true

# Install Rancher
kubectl create namespace cattle-system
helm install rancher rancher-stable/rancher \
  --namespace cattle-system \
  --set hostname=rancher.example.com \
  --set bootstrapPassword=admin
Access Rancher by setting up proper DNS or by port-forwarding:
1
kubectl -n cattle-system port-forward svc/rancher 8080:80
Then open in your browser: http://localhost:8080
3. Octant (Web Mode)
Octant is a developer-focused UI for inspecting Kubernetes resources.
1
2
3
4
5
6
7
8
9
10
11
# Install Octant on your workstation (not in the cluster)
# For Linux
curl -Lo octant.tar.gz https://github.com/vmware-tanzu/octant/releases/download/v0.25.1/octant_0.25.1_Linux-64bit.tar.gz
tar -xzf octant.tar.gz
sudo mv octant_0.25.1_Linux-64bit/octant /usr/local/bin/

# For macOS
brew install octant

# For Windows (download from GitHub and extract)
# https://github.com/vmware-tanzu/octant/releases
Run Octant in web mode:
1
octant --listener-addr 0.0.0.0:7777
Access Octant at http://localhost:7777
4. Kubenav
Kubenav is a mobile-friendly dashboard for Kubernetes.
1
2
3
4
5
6
# Add the Kubenav repository
helm repo add kubenav https://kubenav.github.io/helm-repository
helm repo update

# Install Kubenav
helm install kubenav kubenav/kubenav --namespace kubenav --create-namespace
Access Kubenav:
1
kubectl -n kubenav port-forward svc/kubenav 14122:14122
Then open in your browser: http://localhost:14122
Conclusion
Congratulations! You’ve successfully set up a Kubernetes cluster using Talos OS on Proxmox. This setup provides a solid foundation for running containerized applications in a secure, immutable, and Kubernetes-native environment.
Talos OS offers significant advantages over traditional Linux distributions for Kubernetes deployments, including improved security, reduced maintenance overhead, and simplified upgrades. As you become more familiar with Talos OS, you’ll appreciate its API-driven approach and purpose-built design for Kubernetes.