Install OSTicket with Apache + MySQL
osTicket is an open-source support ticket system that seamlessly integrates inquiries created via email, phone, and web-based forms into a simple, easy-to-use multi-user web interface. In this guide, we’ll walk through the complete installation of osTicket v1.18 on an Ubuntu server with Apache, PHP, and MySQL.
Here are some key features of osTicket.
- Clean Dashboard Reports
- Custom Fields
- Custom Columns and Queues
- Ticket Filters
- Agent Collision Avoidance
- Configurable Help Topics
- Assign and Transfer Tickets
- Auto-Responder
- Thread Action
- Service Level Agreements
- Customer Portal
📋 Requirements
Before proceeding, make sure your system meets the following requirements. 🖥️ System Requirements
- OS: Ubuntu 20.04 / 22.04 LTS (server edition)
- CPU: 1+ GHz processor
- RAM: Minimum 2 GB (4 GB recommended)
- Disk: 10+ GB of free space
🧰 Software Stack
- Apache2 web server
- MySQL 8.x database server
- PHP 8.1 or later with required modules
Step 1: Update Your System
Before installing any packages, it’s best to ensure your system is fully updated.
1
apt update && apt upgrade -y
This updates the local package index and upgrades any outdated packages.
Step 2: Install Apache Web Server
Apache is one of the most widely used web servers, and osTicket works well with it.
1
apt -y install apache2
Enable and start the Apache service:
1
2
3
sudo systemctl start apache2
sudo systemctl enable apache2
sudo systemctl status apache2
Step 3: Install PHP and Required Extensions
osTicket requires PHP with specific extensions to function correctly. The following command installs PHP and all the necessary modules:
1
sudo apt install php php-{gd,imap,xml,json,mbstring,mysql,intl,apcu} libapache2-mod-php -y
Once done, verify your PHP version:
1
php -v
Make sure it’s PHP 8.1 or above.
Step 4: Install MySQL Server
We’ll use the official MySQL APT package to get the latest version.
First, download the MySQL APT config package:
1
2
3
cd /tmp
apt install wget -y
wget https://dev.mysql.com/get/mysql-apt-config_0.8.13-1_all.deb
Install it using:
1
dpkg -i mysql-apt-config_0.8.13-1_all.deb
During installation, you’ll be prompted to select the MySQL version. Choose MySQL 8.0 and confirm.
Now, update and install MySQL:
1
2
apt update
apt install mysql-server -y
Start and enable MySQL:
1
2
sudo systemctl start mysql
sudo systemctl enable mysql
Step 5: Configure the MySQL Database for osTicket
Login to MySQL:
1
mysql -uroot -p
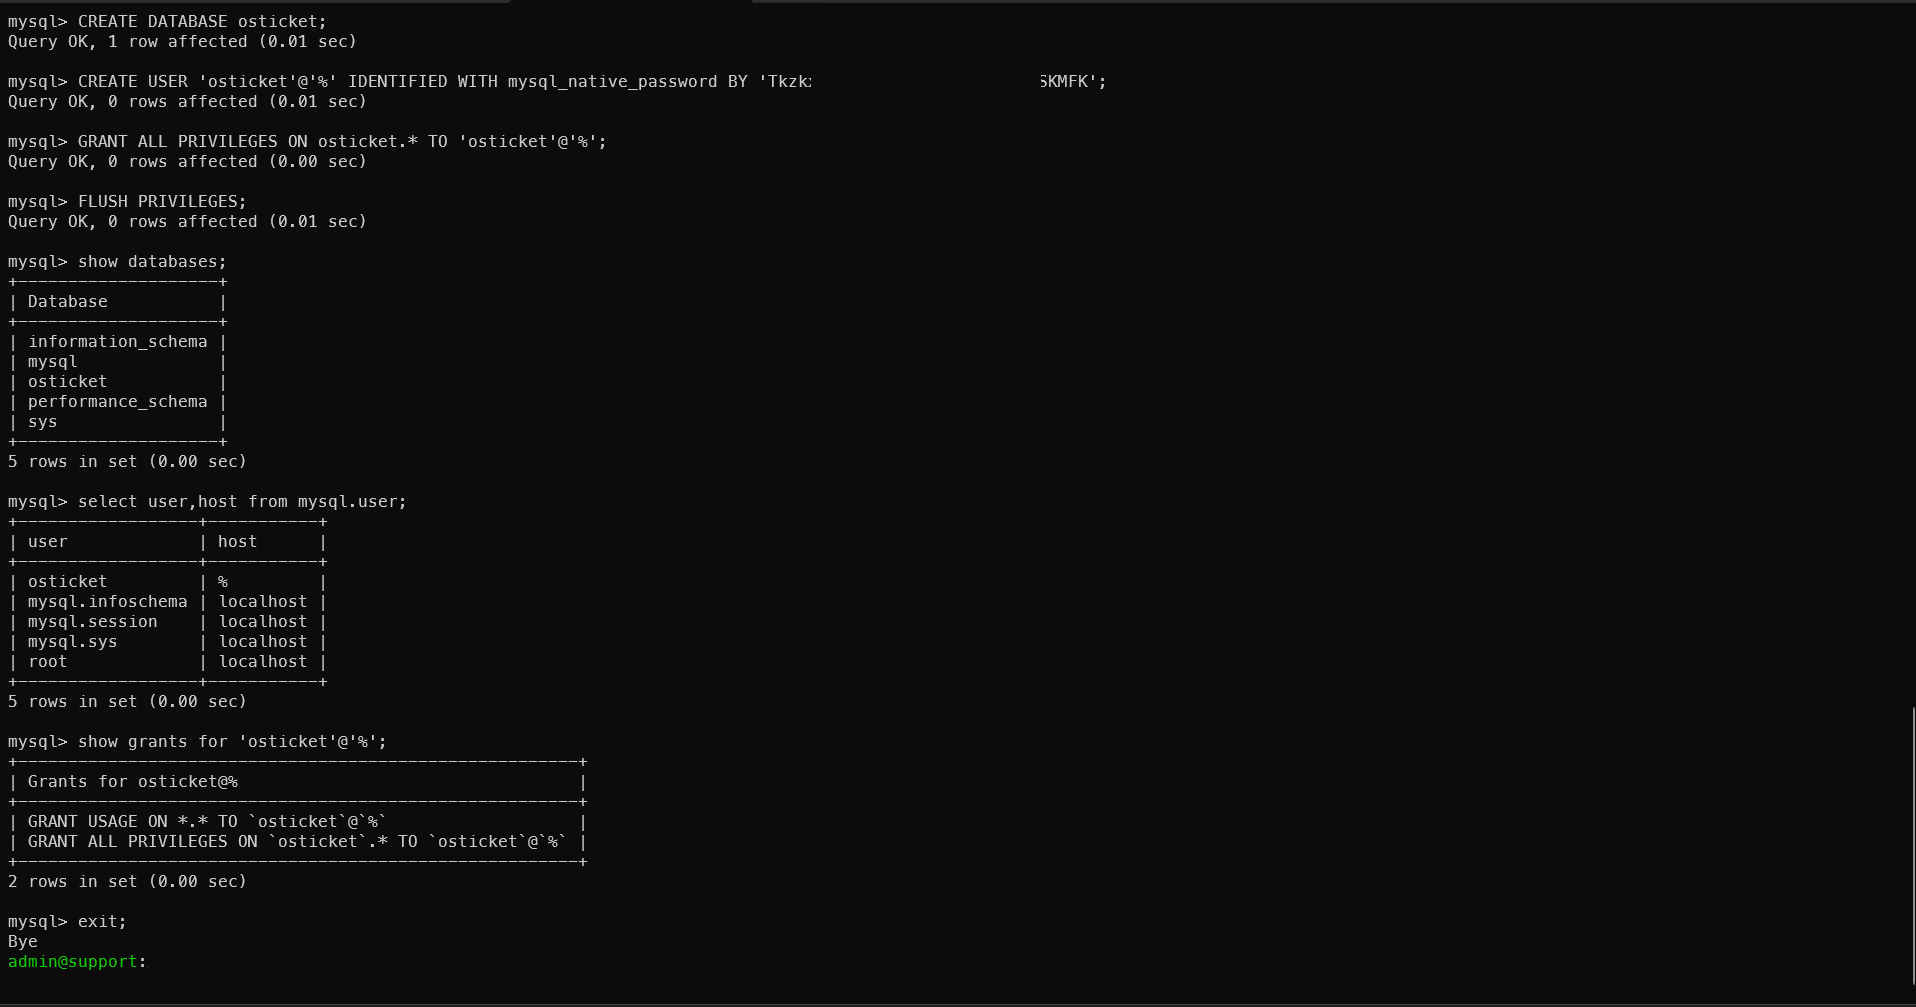
Once inside the MySQL shell, create a database and user:
1
2
3
4
5
CREATE DATABASE osticket;
CREATE USER 'osticket'@'%' IDENTIFIED WITH mysql_native_password BY 'StrongPasswordHere';
GRANT ALL PRIVILEGES ON osticket.* TO 'osticket'@'%';
FLUSH PRIVILEGES;
EXIT;
This creates a secure and isolated environment for osTicket’s data.
Step 6: Download and Prepare osTicket
Download the latest release from GitHub:
1
wget https://github.com/osTicket/osTicket/releases/download/v1.18/osTicket-v1.18.zip
Unzip it and move it to your web directory:
1
unzip osTicket-v1.18.zip -d /var/www/osticket
Copy the sample configuration file and set correct permissions:
1
2
cp /var/www/osticket/upload/include/ost-sampleconfig.php /var/www/osticket/upload/include/ost-config.php
chown -R www-data:www-data /var/www/osticket/
This prepares osTicket’s web interface for installation.
Step 7: Configure Apache Virtual Host with SSL
To securely serve your osTicket instance, we’ll create an Apache virtual host with a self-signed SSL certificate.
Generate SSL Certificate
1
2
3
4
5
sudo mkdir -p /etc/ssl/selfsigned
sudo openssl req -x509 -nodes -days 365 -newkey rsa:2048 \
  -keyout /etc/ssl/selfsigned/osticket.key \
  -out /etc/ssl/selfsigned/osticket.crt \
  -subj "/C=US/ST=State/L=City/O=Company/OU=IT/CN=DOMAIN.TLD"
This will generate a certificate and private key.
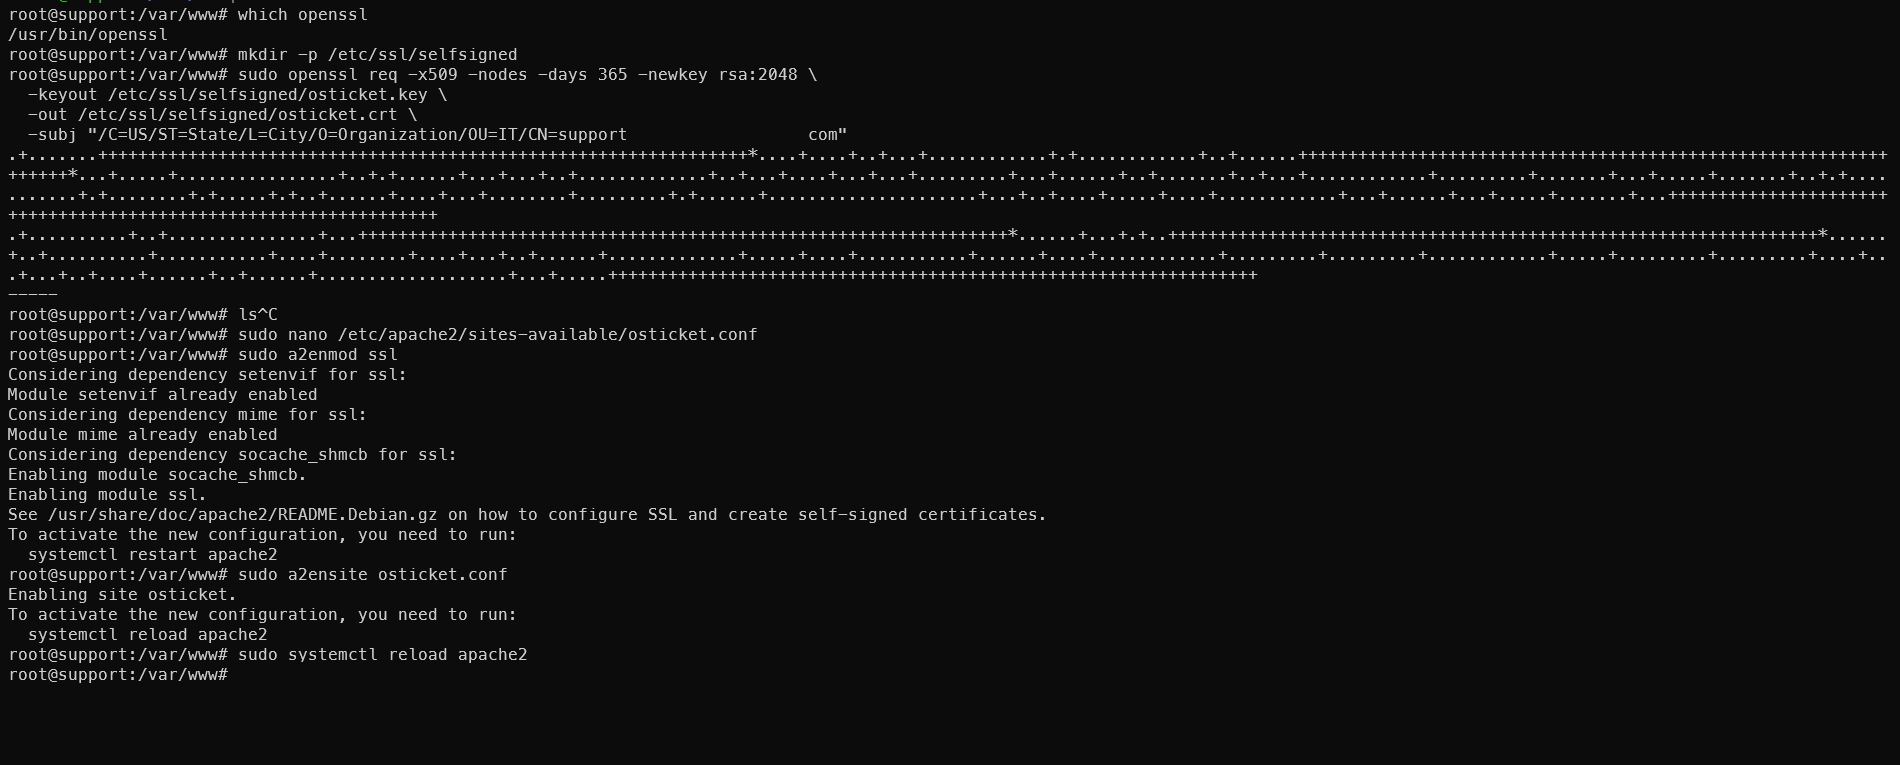
Configure Apache
Create the virtual host file:
1
sudo nano /etc/apache2/sites-available/osticket.conf
Paste the following:
1
2
3
4
5
6
7
8
9
10
11
12
13
14
15
16
17
18
19
20
21
22
23
24
25
26
27
<VirtualHost *:80>
    ServerAdmin admin@domain.com
    ServerName support.fairsoftservices.com
    DocumentRoot "/var/www/osticket/upload"
    Redirect permanent / https://support.fairsoftservices.com/
</VirtualHost>

<VirtualHost *:443>
    ServerAdmin admin@domain.com
    ServerName support.fairsoftservices.com
    DocumentRoot "/var/www/osticket/upload"

    SSLEngine on
    SSLCertificateFile /etc/ssl/selfsigned/osticket.crt
    SSLCertificateKeyFile /etc/ssl/selfsigned/osticket.key

    <Directory "/var/www/osticket/upload">
        Require all granted
        Options Indexes FollowSymLinks
        AllowOverride All

        # Healthcheck 200 response
        RewriteEngine On
        RewriteCond %{REQUEST_URI} ^/healthcheck$
        RewriteRule ^.*$ - [R=200,L]
    </Directory>
</VirtualHost>
Enable SSL and the site:
1
2
3
sudo a2enmod ssl rewrite
sudo a2ensite osticket.conf
sudo systemctl reload apache2
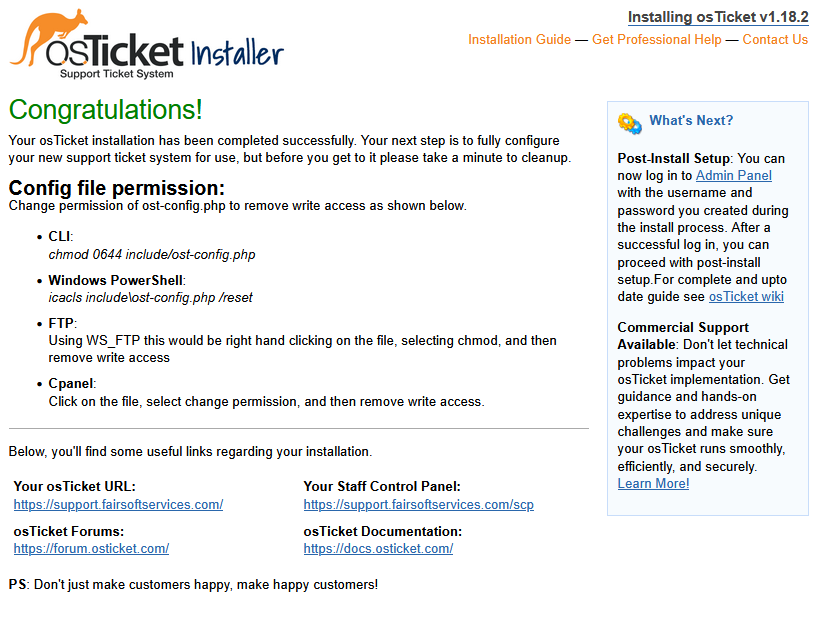
Step 8: Final Permissions and Setup Cleanup
Ensure the config file is in place and permissions are correct:
1
2
mv /var/www/osticket/upload/include/ost-sampleconfig.php /var/www/osticket/upload/include/ost-config.php
chmod 0644 /var/www/osticket/upload/include/ost-config.php
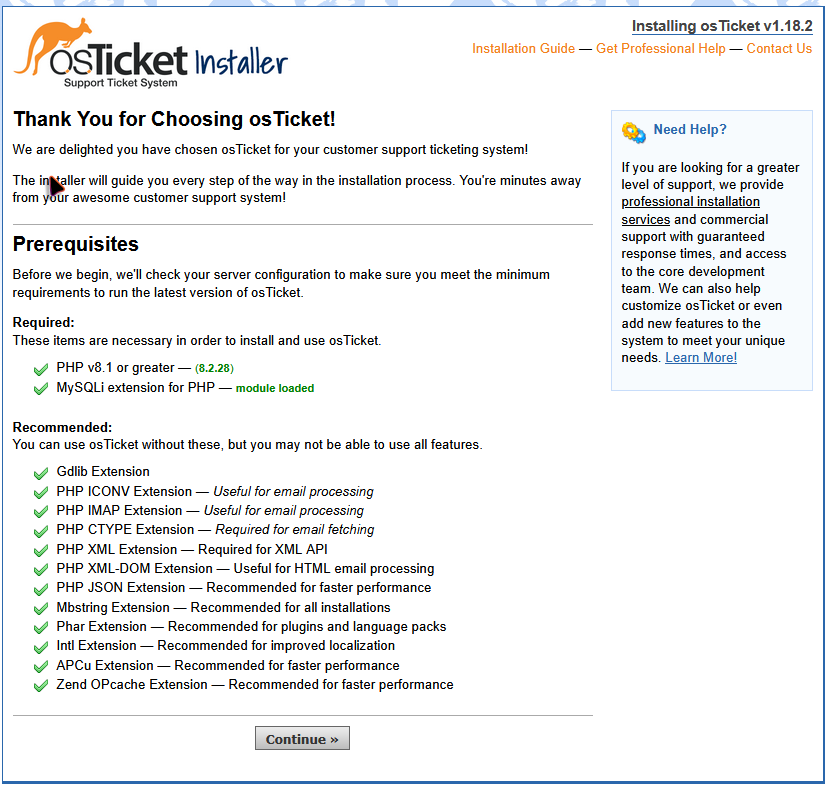
Step 9: Access the Web Installer
Visit your domain in a browser:
1
https://domain.tld
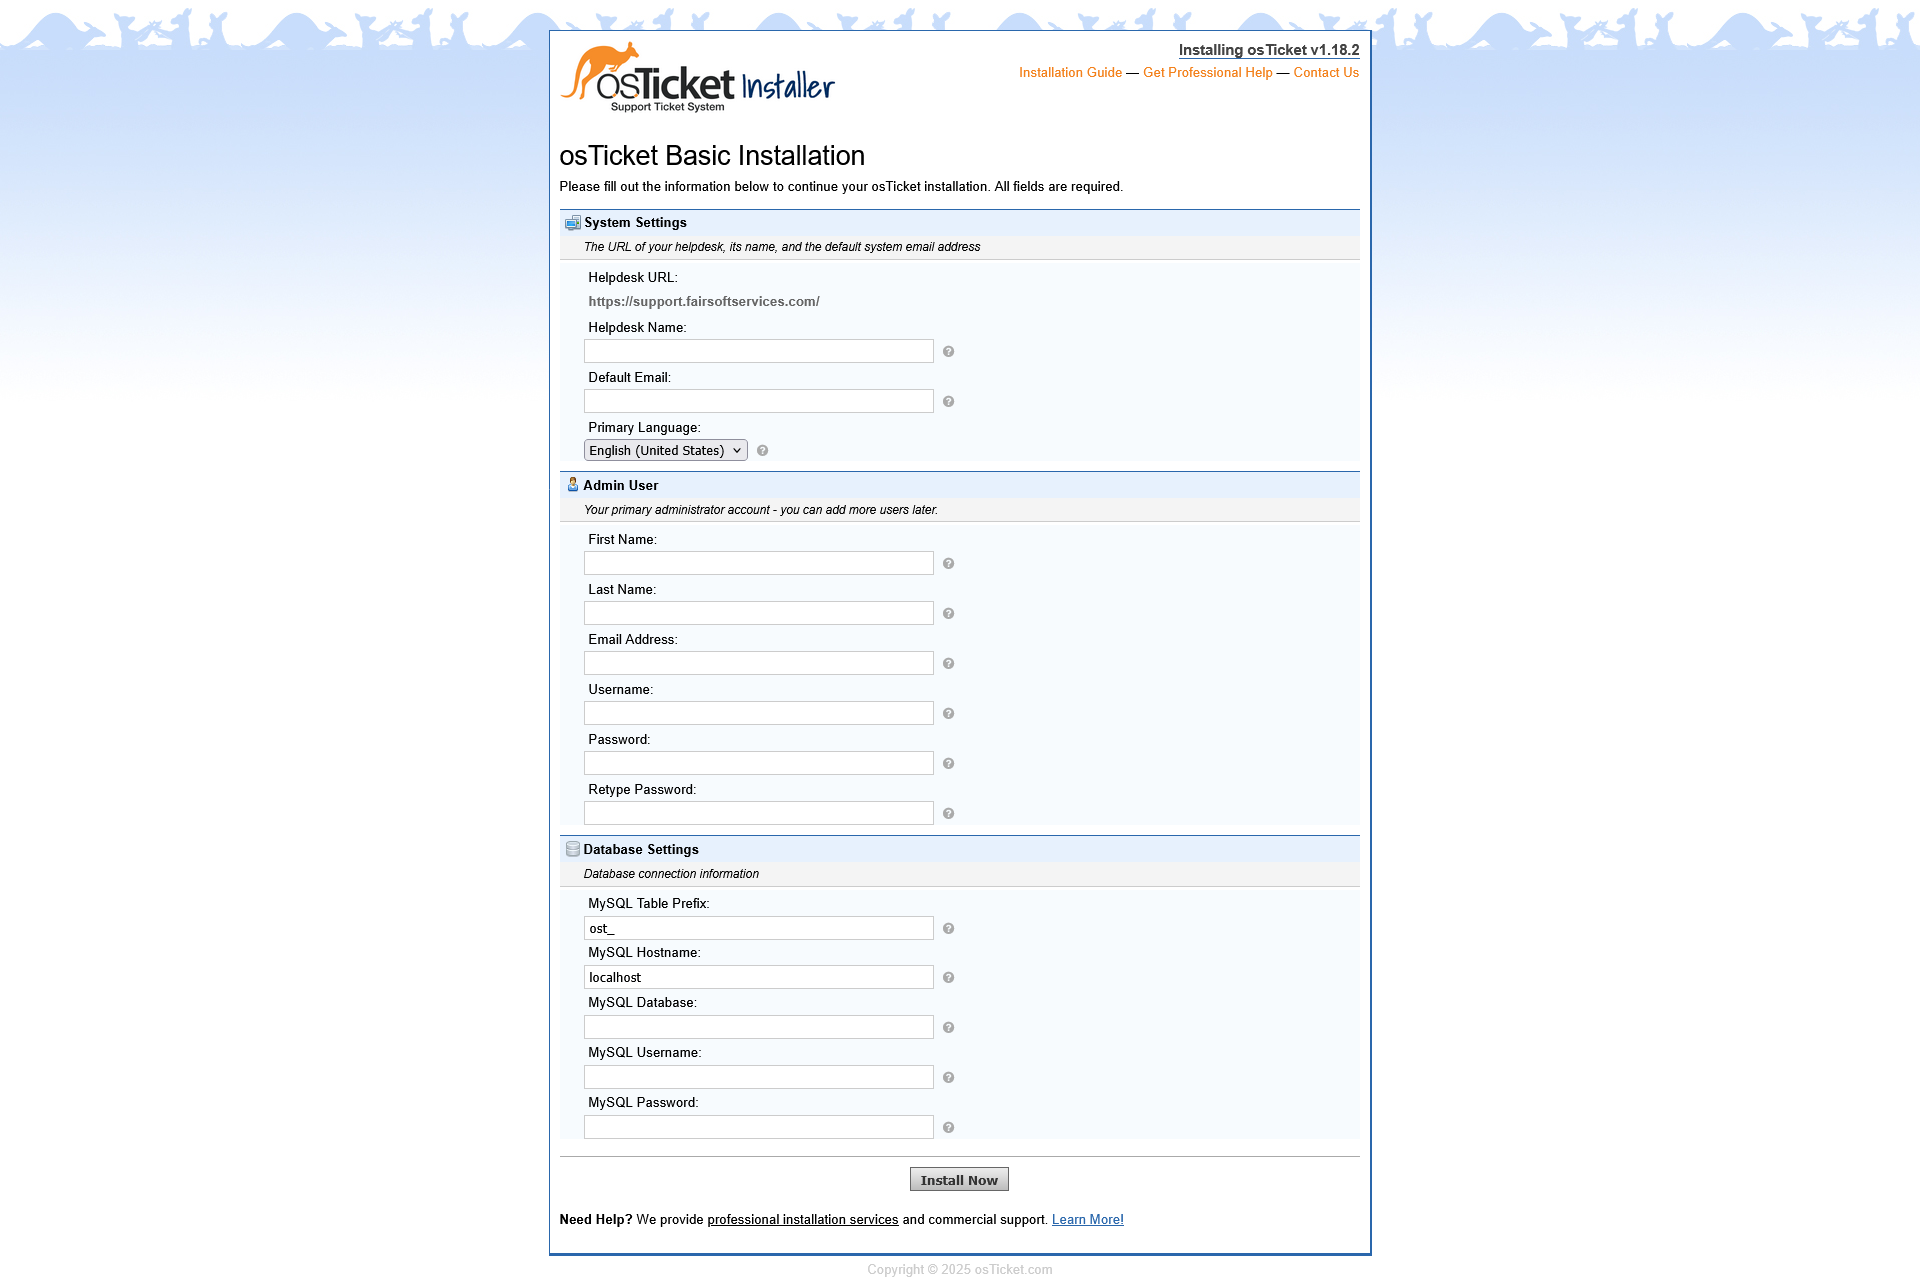
Follow the installer steps:
- Enter site name, admin email/password
- Provide MySQL DB name: osticket
- MySQL user: osticket
- Password: the one you created earlier
Once complete:
1
rm -rf /var/www/osticket/upload/setup/
This removes the installer for security reasons.
Post-Installation Recommendations
- Replace self-signed cert with Let’s Encrypt via Certbot
- Update osTicket config to disable auto-updates
- Regularly back up the database and config
- Secure MySQL and Apache (ufw, fail2ban, etc.)
- Create admin and agent roles for ticket management
Wrapping Up 🙌
Congratulations! 🎉 You’ve successfully installed and configured osTicket with Apache, PHP, and MySQL You now have a powerful support ticket system to manage tickets efficiently.