DietPi Headless webmin Setup
🍃 What is DietPi?
DietPi is a lightweight and optimized Debian-based operating system specifically designed for single-board computers like Raspberry Pi, as well as other low-powered devices. It focuses on providing a minimal yet highly configurable environment for users who want performance and efficiency in their setups.
🏆 Key Features of DietPi:
- Minimal Footprint: DietPi is one of the lightest operating systems available, with an installation size as small as 400MB.
- Highly Optimized: Each installation is tuned to reduce CPU and memory usage, ensuring faster boot times and smoother performance.
- User-Friendly Configuration: Comes with the
DietPi-ConfigandDietPi-Softwaretools, making system and software setup effortless. - Customizability: DietPi allows you to install only the software you need, reducing unnecessary bloat.
- Wide Device Support: Works not only on Raspberry Pi but also on devices like Odroid, Pine64, and virtual machines.
💡 Why Use DietPi?
DietPi is a preferred choice for enthusiasts and developers looking for a no-nonsense operating system that prioritizes performance and simplicity. Here’s why you might choose DietPi:
- 🔧 Performance: Its lightweight nature ensures maximum efficiency, making it ideal for low-powered devices or applications requiring optimal resource management.
- 📦 Simplified Software Installation: DietPi includes a software catalog (
DietPi-Software) that allows you to install popular tools and applications like Docker, Pi-hole, Home Assistant, and more with just a few clicks. - 🖥️ Versatility: Whether you’re setting up a media server, lightweight desktop, or even a headless system, DietPi provides the flexibility to meet your needs.
- 🌍 Community and Support: DietPi has an active community and excellent documentation, making troubleshooting and learning easier for users of all levels.
🔥 Interesting Points About DietPi
- Energy Efficient: Consumes less power than most other Raspberry Pi operating systems, making it ideal for 24/7 use cases like servers or IoT devices.
- Automated Backups: DietPi includes tools for automated backups, ensuring data safety during system upgrades or failures.
- Built-In Benchmarks: Includes benchmarking tools to test CPU and memory performance.
- Headless Configuration: Perfect for headless setups, allowing you to control and configure the system remotely.
- Pre-Configured Software Options: Offers streamlined options for web servers, file sharing, VPNs, and more.
- Lightweight Desktop Environments: If needed, you can install LXDE, XFCE, or MATE for a lightweight graphical interface.
🛠️ Use Cases for DietPi
- Home Server: Set up file sharing, media servers (Plex/Emby), or Nextcloud.
- Ad Blocking: Use Pi-hole for network-wide ad blocking.
- IoT Projects: Build efficient and resource-light IoT systems.
- Development Environment: Install Docker, Node.js, or LAMP stacks for lightweight development.
- Network Tools: Configure VPNs or network monitoring tools with ease.
🌐 Download and Install DietPi
You can download the DietPi operating system directly from the official website:
👉 Download DietPi
Steps to Install DietPi:
1. Download the Image:
Visit the DietPi download page and select your device.
2. Flash the Image:
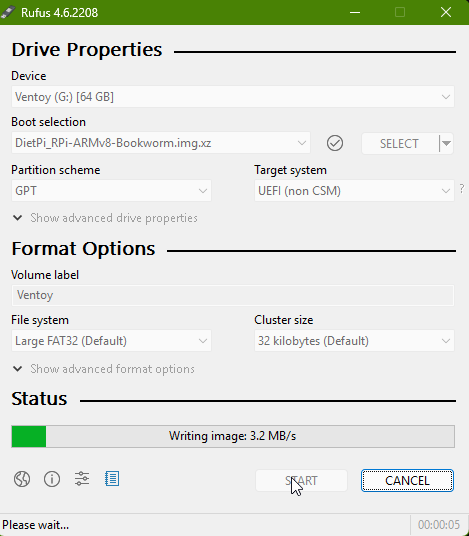
Use tools like Rufus, Balena Etcher, or Raspberry Pi Imager to write the DietPi image to an SD card or USB drive.
For this process, I am using Rufus to flash the DietPi image to the SD card.
Steps:
- Download Rufus: Go to the Rufus website and download the tool.
- Insert SD Card or USB Drive: Plug in your SD card or USB drive into your computer.
- Select the DietPi Image: Open Rufus and select the DietPi image you want to flash.
- Start Flashing: Click on ‘Start’ to write the DietPi image onto your SD card or USB drive.
Once the image is written, follow the next steps to configure your network settings.
- Update Network Configuration:
- Open the
dietpi.txtfile in your favorite text editor. - Update the network settings based on your preferences. In this example, I am using a Class A network at home and updated accordingly.
- Open the
1
2
3
4
5
6
7
8
9
10
11
12
13
14
15
16
17
18
19
20
##### Network options #####
# Enable Ethernet or WiFi adapter: 1=enable | 0=disable
# - If both Ethernet and WiFi are enabled, WiFi will take priority and Ethernet will be disabled.
# - If using WiFi, please edit dietpi-wifi.txt to pre-enter credentials.
AUTO_SETUP_NET_ETHERNET_ENABLED=1
AUTO_SETUP_NET_WIFI_ENABLED=1

AUTO_SETUP_NET_WIFI_SSID=muju
AUTO_SETUP_NET_WIFI_KEY=XXXXXXXXXX

# WiFi country code: 2 capital letter value (e.g. GB US DE JP): https://en.wikipedia.org/wiki/ISO_3166-1_alpha-2
# - NB: This choice may be overridden if the WiFi access point sends a country code.
AUTO_SETUP_NET_WIFI_COUNTRY_CODE=GB

# Enter your static network details below, if applicable.
AUTO_SETUP_NET_USESTATIC=0
AUTO_SETUP_NET_STATIC_IP=XX.XX.XX.XX
AUTO_SETUP_NET_STATIC_MASK=XXX.XXX.XXX.o
AUTO_SETUP_NET_STATIC_GATEWAY=XX.XX.XX.XX
AUTO_SETUP_NET_STATIC_DNS=8.8.8.8 9.9.9.9
- Modify Wi-Fi Configuration: Open the
dietpi-wifi.txtfile and modify the Wi-Fi settings.
1
2
aWIFI_SSID[0]='muju'
aWIFI_KEY[0]='XXXXXXXXXX'
- Save Changes: Save the changes you made to the
dietpi.txtanddietpi-wifi.txtfiles.
3. Boot Your Device:
Insert the SD card/USB into your device and boot it up. Wait for DietPi to complete some initial setup steps. Follow the on-screen prompts to configure your DietPi installation.
4. Customize Your Setup:
DietPi also comes pre-installed with Dropbear SSH Server.
1
2
username = root
password = dietpi
Use dietpi-software to install additional applications as per your needs.
1. Login to the Server via SSH
- Log in to your DietPi server using SSH:
1
ssh root@<your-server-ip>
- Once logged in, execute the following to start installing applications:
1
dietpi-software
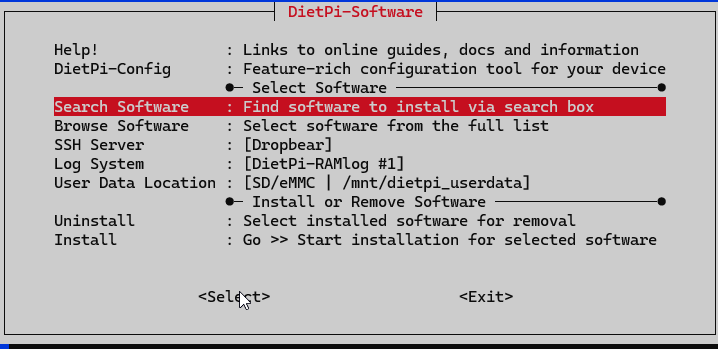
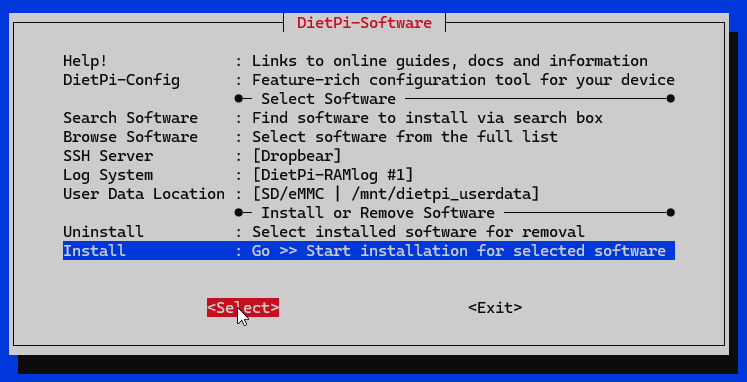
2. Search for Webmin Package
- After running
dietpi-software, search for the Webmin package by typing its name. - Webmin allows you to control the server via a web interface over HTTPS.
 |
 |
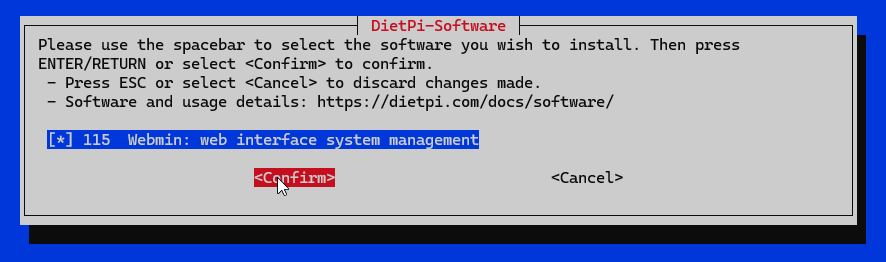
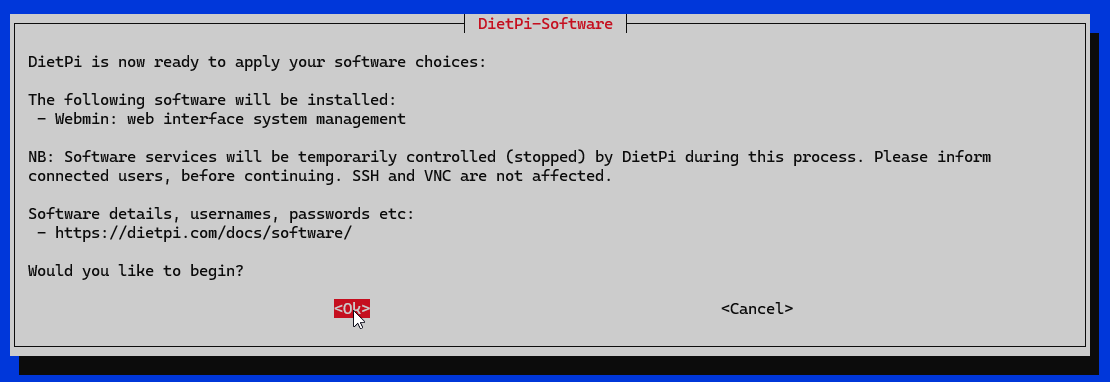
3. Select Webmin Package for Installation
- Select the package named webmin: web interface system management.
- Proceed with the installation by following the on-screen prompts.
You can explore the software options for DietPi by visiting the official site DietPi software documentation. This page provides an extensive list of applications that can be easily installed and configured on your DietPi system
 |
 |
 |
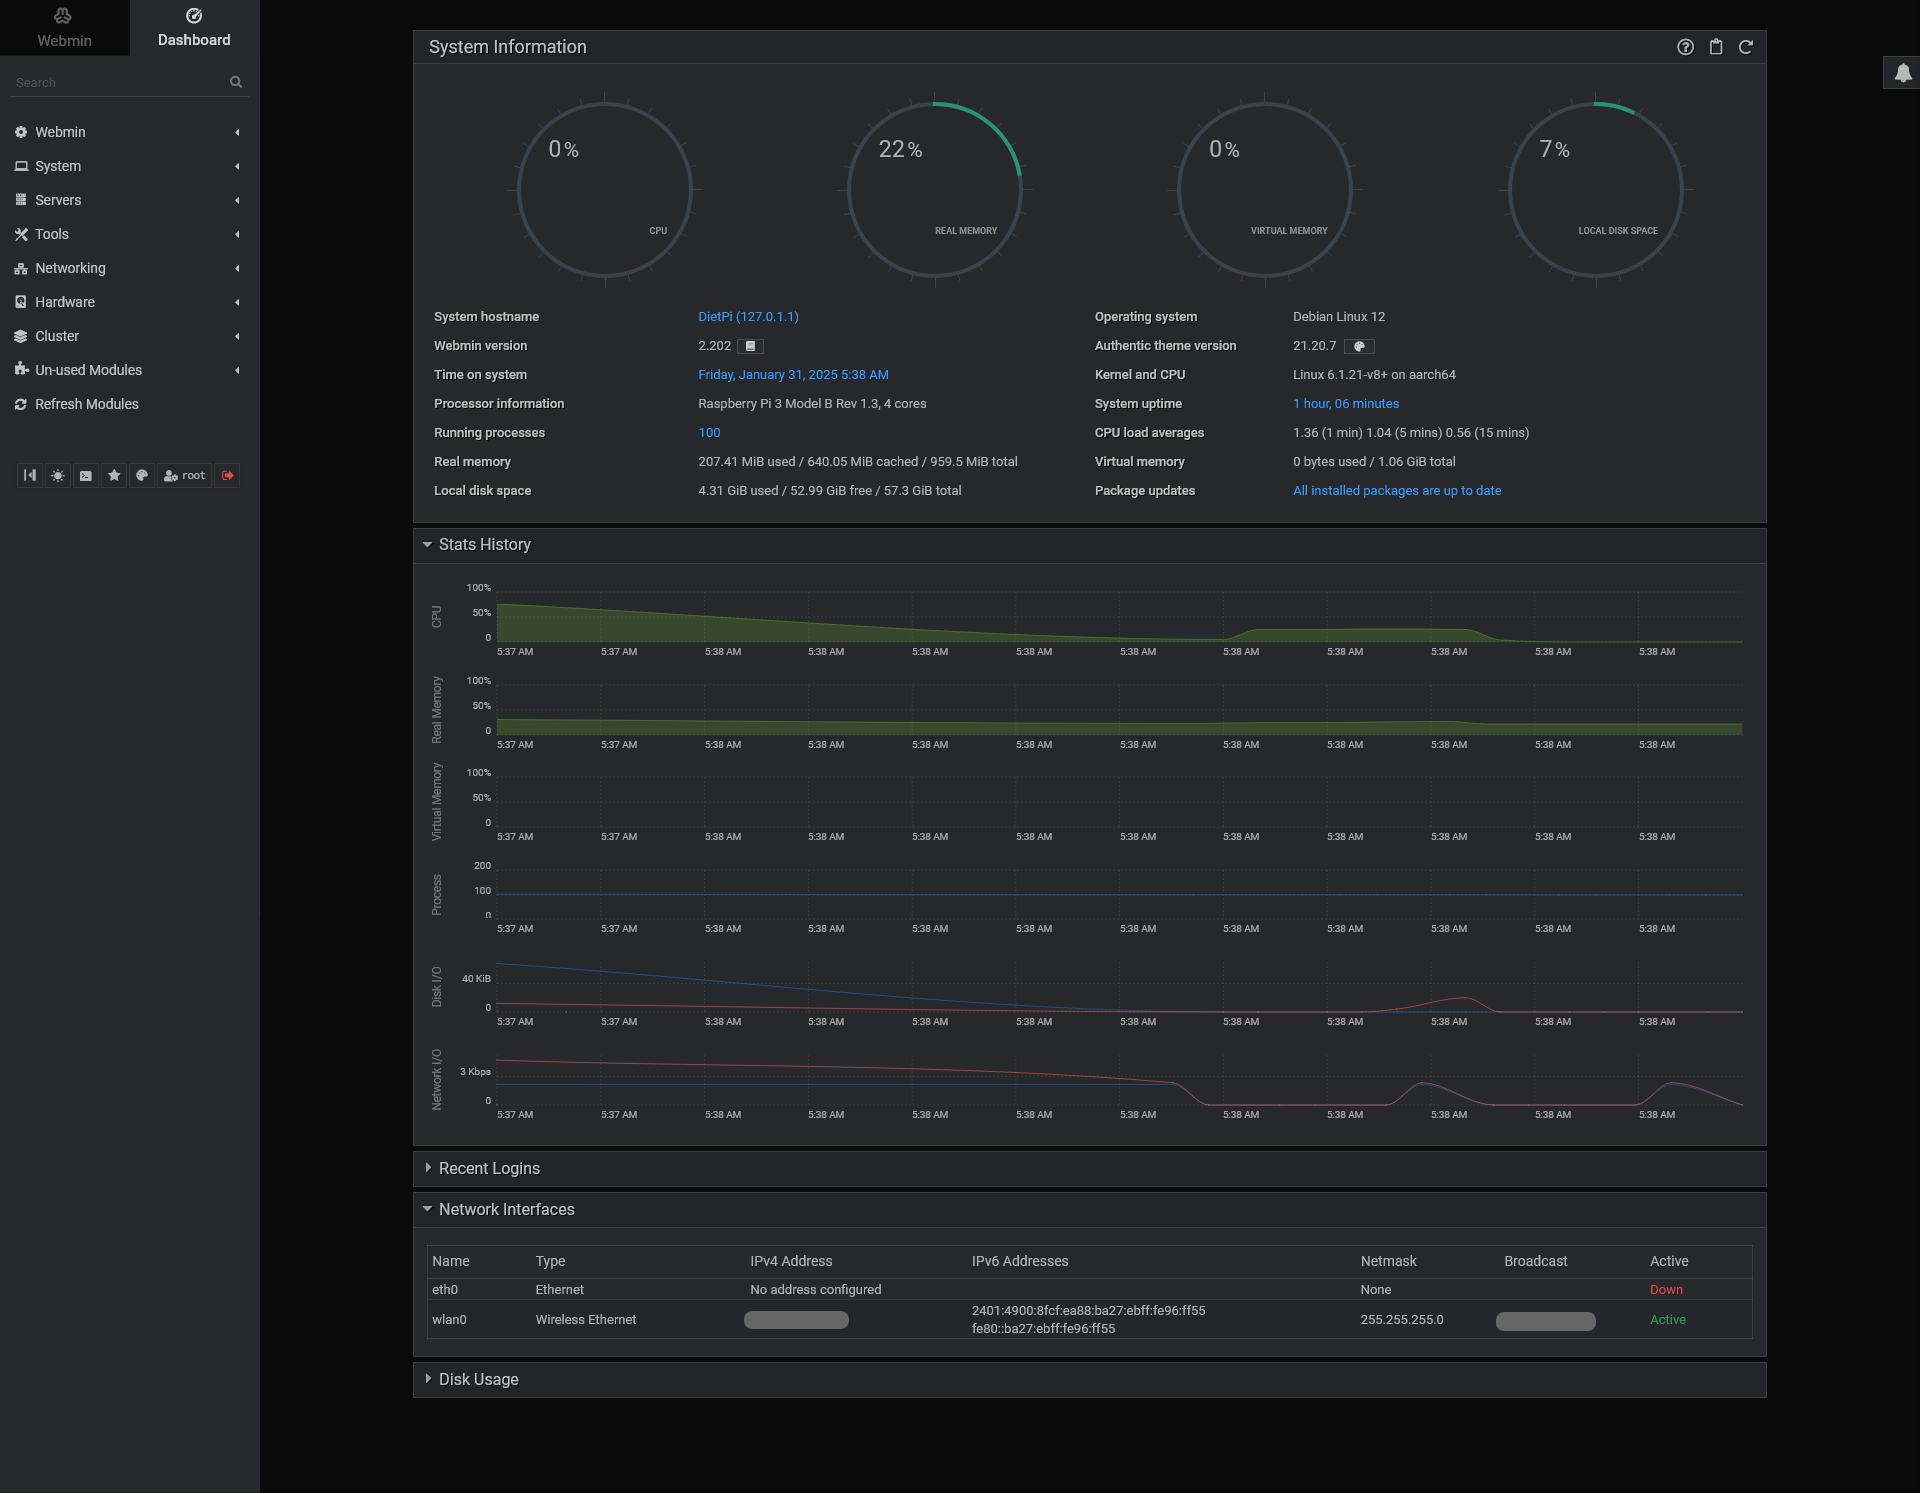
4. Access Webmin
- Once the installation is completed, you can access Webmin via HTTPS:
https://<your-server-ip>:10000 - Log in with the user credentials you created during the initial server setup.
🚀 Conclusion
DietPi stands out as a powerful and lightweight Linux operating system for Raspberry Pi and other low-powered devices. With its minimal design, ease of use, and robust performance, it’s an excellent choice for hobbyists and professionals alike. Whether you’re building a home server, IoT project, or just exploring Linux, DietPi offers the tools and flexibility to bring your vision to life.